
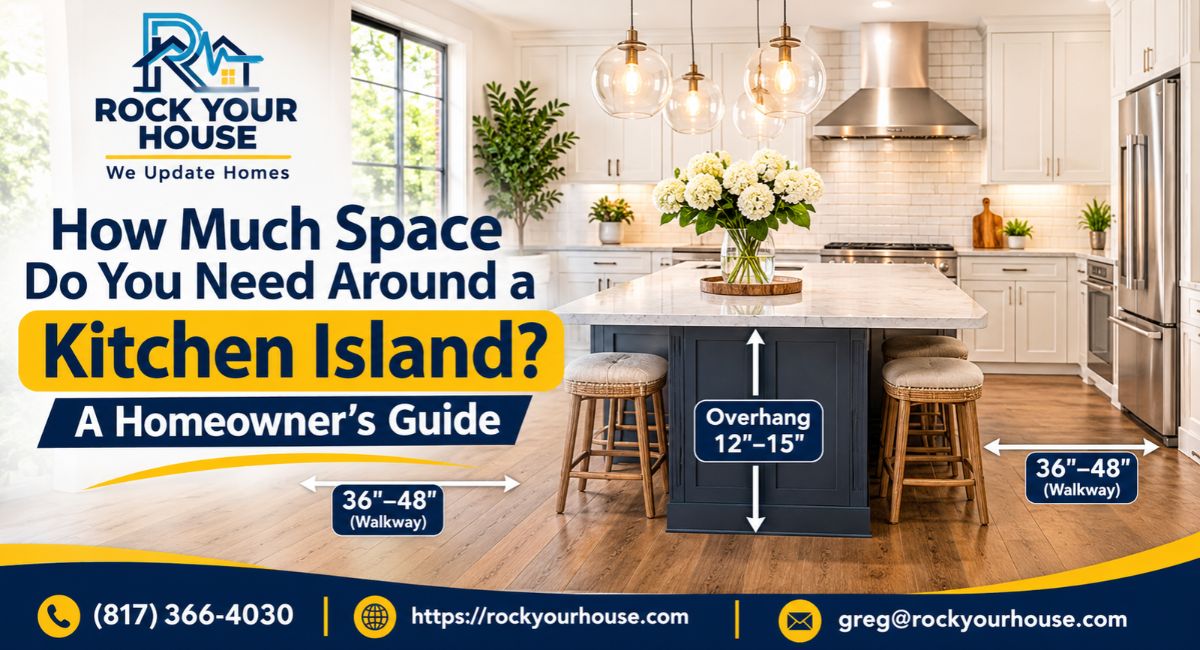
You open the dishwasher to unload plates. Your hip hits the island. Someone walks behind you with a laundry basket and has to wait. Then a stool scrapes the cabinet as another person tries to sit down.
This is what a tight island feels like. It looks great in photos. It works poorly when a real family uses it.
The fix is not a smaller island or a bigger kitchen. The fix is knowing the numbers. Kitchen island clearance is the open floor space between your island and everything around it. Get that space right and the kitchen flows. Get it wrong and you will feel the problem every day.
This guide gives you actual measurements. You will see how wide walkways should be, how appliance doors change the math, how much room seating needs and what to do when your kitchen is small. The focus is function, not decoration.
Why Kitchen Island Clearance Matters
An island adds counter space, storage and seating. It also adds an obstacle in the middle of your busiest room.
Every island steals floor space. The question is whether you have enough left over. Clearance affects four things:
- Safety. Hot pans, knives and open oven doors need room around them.
- Traffic flow. People need to pass without stopping the cook.
- Appliance use. Doors and drawers must open fully.
- Comfort. Seated guests should not feel crowded.
A small mistake of 4 or 6 inches can change how a kitchen feels. That is why designers measure twice and then test with tape on the floor before ordering cabinets.
Standard Kitchen Island Clearance
Most design guidance comes from the National Kitchen & Bath Association, known as NKBA. The group publishes planning guidelines that designers and remodelers follow across the country. Their numbers are a solid base for any layout.
Here are the core figures in one place.
| Situation | Minimum Clearance | Comfortable Clearance |
| Walkway with one cook | 42 inches | 42 to 48 inches |
| Work aisle with two cooks | 48 inches | 48 to 54 inches |
| Basic walkway, no work happening | 36 inches | 36 to 42 inches |
| Behind seated people, no traffic | 32 inches | 36 inches |
| Behind seated people, with traffic | 44 inches | 48 inches |
| Around a cooktop on the island | 42 inches | 48 inches |
Remember the pattern. Forty-two inches is the working minimum for a kitchen with one cook. Forty-eight inches is better if two people cook together. Anything under 36 inches begins to feel like a hallway, and it can fail code in some situations.
These numbers measure from the edge of the island countertop to the nearest wall, cabinet or appliance front. They do not measure from the base cabinet. The countertop overhang counts.
Understanding Walkway Width in Detail
Walkway width is the heart of any kitchen island walkway plan. The right number depends on who uses the space and how.
One Cook Kitchens
If one person does most of the cooking, 42 inches works well. That gives you room to turn, open a drawer and step sideways. It also allows another person to slip past if they are not carrying anything.
Many Central Texas homes were built with this in mind. A single 42 inch aisle on each side of the island is common in open plans from the past 15 years.
Two Cook Kitchens
If two people often cook at once, go to 48 inches. One person can stand at the counter while the other moves behind them. Families that bake together, hosts who cook with a partner and homes with teenagers often fall in this group.
Forty-eight inches also helps when you carry hot dishes. You can turn without clipping the island corner.
Main Traffic Routes
Some kitchens double as a path from the garage to the living room. Others have a back door near the island. In these cases, treat the aisle as a walkway first. Give it at least 42 inches, and 48 if kids and pets run through.
Trace the path your family walks with groceries or a laundry basket. If that path squeezes past the island, widen it.
Accessible Design
If someone uses a wheelchair or walker, clearances grow. Accessible design standards often call for 40 inches as an absolute minimum between opposing surfaces. They also call for a 60 inch turning space. For long term living, many homeowners plan for 48 inches or more on the main aisles. This is useful even if no one needs it today. Aging in place is easier when the kitchen already has the space.
Appliance Clearance: The Part People Forget
Walkway numbers assume nothing is open. Real kitchens have doors, drawers and trays that swing out. Appliance clearance is where many island plans fail.
Dishwasher
An open dishwasher door and a pulled out rack extend about 24 to 35 inches into the aisle. If the dishwasher faces the island, you may stand in the door path while loading it. A 42 inch aisle gives you just enough room to stand beside the open door and still move.
At 36 inches, the door nearly blocks the aisle. Anyone who loads the dishwasher blocks the entire walkway.
A good rule: place the dishwasher so its door does not open toward the island if the aisle is under 42 inches. Put it beside the sink, away from the island’s corner.
Oven and Range
A wall oven door drops down about 20 to 25 inches. A range door is similar. You need room to stand in front of the door and lift a hot dish out.
For an oven that faces an island, plan for at least 48 inches between the range front and the island edge. This lets you open the door, step back and turn without bumping the counter. It also keeps the door from hitting a person on the other side.
NKBA also recommends landing space beside a cooktop. This is a clear counter area for setting down a hot pan. If your cooktop sits on the island, check that both sides still have counter space.
Refrigerator
Fridge doors are the biggest swing item. A standard door swings out about 30 to 36 inches when fully open. French door models take less room but still need clearance. Drawers in the bottom half need extra space to pull out.
If the fridge sits across from the island, measure the open door depth and add at least 12 inches. A narrow aisle can make the fridge hard to use. Check the manufacturer’s spec sheet before you decide.
Cabinet Doors and Drawers
Base cabinet doors open about 18 to 24 inches. Deep drawers pull out their full depth. Trash and recycling pullouts need to extend in front of you, with room for a person to stand.
Do not place a trash pullout where it blocks the main aisle. Place it near the prep area but outside the walkway.
Quick Real Example
Say you have a 42 inch aisle between your island and the cabinet run. The dishwasher sits in that run. A 24 inch dishwasher door opens and takes 24 to 35 inches of space. That leaves 7 to 18 inches to stand in. Now add someone walking by. It will not work.
Widen the aisle to 48 inches, and you gain 6 more inches. That small change makes dishwasher loading comfortable.
Seating Requirements for an Island
Seating changes everything. People sitting at an island take space on both sides of the counter. You need overhang, knee room and clearance behind the stool.
Counter Overhang
Overhang is the part of the countertop that extends past the cabinet base. It gives your knees a place to go.
| Counter Height | Minimum Overhang | Comfortable Overhang |
| 36 inch (standard counter) | 12 inches | 15 inches |
| 42 inch (bar height) | 12 inches | 12 to 15 inches |
| 30 inch (table height) | 18 inches | 18 inches |
Standard counter height is 36 inches. Bar height is 42 inches. Table height is 30 inches. Most islands use the standard height with stools. A 12 inch overhang is the minimum. Fifteen inches feels better, especially for adults.
Thick stone needs support. A long overhang of stone without brackets can crack or sag over time. For a 12 inch overhang, many installers say a brace is needed once it passes a certain depth, depending on material and thickness. Ask your fabricator for the exact limit. Our quartz vs granite countertops comparison covers how each stone handles spans and weight.
Width Per Person
Each seat needs at least 24 inches of width. Thirty inches is more comfortable. Tight seats make elbows touch.
A 6 foot island (72 inches) seats three people at 24 inches each. Four people would be tight. If you want four seats, aim for about 8 feet.
Clearance Behind the Stools
This is where many islands fail. The stool sits on the floor, and the person sitting on it needs room behind them.
If no one walks behind the stools, 32 to 36 inches from the island edge to the wall or cabinet is enough. If people do walk behind, plan for 44 to 48 inches. This lets someone pass behind a seated person without bumping their back.
A stool pushed out about 8 to 12 inches takes extra space. Do not forget this when you measure.
Pick Stools That Fit
Backless stools slide under the counter. This saves aisle space when no one is sitting. Stools with backs are more comfortable but stay out in the walkway. Swivel seats can swing into the aisle.
Counter stools should have a seat height about 10 to 12 inches below the counter surface. For a 36 inch counter, a 24 to 26 inch seat height works.
How Big Should Your Island Be?
Clearance and island size are tied together. A bigger island leaves less floor. Start with the room, then size the island to fit.
The 13 Foot Rule
Here is a simple check. A basic island is 24 inches deep, with 24 inch base cabinets on the wall side. If you want 42 inch aisles on both sides, add them up:
- 24 inches (wall cabinet)
- 42 inches (aisle)
- 24 inches (island)
- 42 inches (aisle)
- 24 inches (opposite cabinet or wall)
That equals 156 inches, or 13 feet. This is the minimum room width for a kitchen with a standard island and a full aisle on each side. With less width, think twice about a full island.
Island Depth
Most islands are 36 to 48 inches deep. A 24 inch island is the practical minimum. Deeper islands give more prep space and room for a sink or cooktop. But if the island gets wider than about 48 inches, reaching across the center becomes hard. A very deep island may also need a seam in the stone.
Island Length
A functional island is usually 4 to 8 feet long. Longer islands work in big open rooms. But long islands can cut off the kitchen from the rest of the home. If an island is over 10 feet, consider a break or opening so people can walk through.
A Simple Formula
Use this formula to find the largest island that fits:
Room width, minus cabinet depths on each side, minus two aisles = maximum island depth.
Example: a 14 foot (168 inch) room has two 24 inch cabinet runs. Subtract 48 inches for cabinets. That leaves 120 inches. Subtract two 42 inch aisles (84 inches). The maximum island depth is 36 inches. That works with room to spare.
The Work Triangle and Your Island
The kitchen work triangle connects the sink, the cooktop and the refrigerator. It is a classic planning concept. It helps you reduce steps between the three main work areas.
NKBA guidelines suggest each side of the triangle fall between 4 and 9 feet. The total of all three should be between 13 and 26 feet. Also, an island or other obstacle should not cut into any leg of the triangle by more than 12 inches.
An island placed right between the fridge and the sink can break your flow. You will walk around it dozens of times each day.
Modern designers often use work zones instead of a strict triangle. A zone layout has a prep zone, a cooking zone, a cleaning zone and a storage zone. The island often serves as the prep zone. Whichever method you use, the island should help the flow, not block it.
Putting a Cooktop or Sink on the Island
Adding a sink or cooktop to an island changes the clearance rules.
Sink on the Island
A sink on an island puts the cleaning zone in the center of the room. This is great for conversation. It also adds a dishwasher location nearby. The tradeoff is more plumbing and a tighter plan. Keep at least 42 inches behind the sink. Plan for at least 18 inches of counter on one side for dishes.
Cooktop on the Island
A cooktop on an island needs a vent hood or downdraft. Hoods hang from the ceiling and can block sight lines. Downdraft vents pull air down and out, but they handle less smoke than a hood. A cooktop also needs landing space on both sides. A common guide is 15 inches on one side and 12 on the other at minimum.
Keep seating on the far side of the cooktop. Never place stools next to a burner. Hot oil and children do not mix.
Plan a 48 inch aisle behind a cooktop island. People turn with hot pots often, and this space adds a safety margin.
A Simple Layout Diagram
Here is a top-down picture of a medium kitchen with a one cook aisle on the left and a two cook aisle at the stove side.
____________________________________________
| [FRIDGE] [RANGE] [SINK] [DISHWASHER] |
| |
| 48″ aisle (cooking side) |
| |
| +——————————-+ |
| | ISLAND 36″ x 96″ | |
| +——————————-+ |
| o o o (stools) |
| |
| 44″ to 48″ behind stools |
|______________________________________________|
The key points from this layout are simple:
- Appliances sit on the wall, with a wide aisle in front.
- Stools are on the side without appliances.
- The aisle behind stools is wide enough for traffic.
Small Kitchen Layout Solutions
Not every kitchen has 13 feet of width. If your kitchen is smaller, you still have options.
Use a Narrow Island
A 24 inch deep island fits in tighter rooms. It gives you extra counter and storage without crowding. Pair it with a 42 inch aisle on the main work side and a 36 inch aisle on the lighter side.
Choose a Peninsula
A peninsula connects to the cabinet run at one end. It gives you island features with less floor loss. It also gives you seating at the open end. Because one end is attached, you only need an aisle on one side. For many smaller kitchens, a peninsula is the smarter choice.
Try a Rolling Island
A rolling cart or movable island gives you counter space on demand. Push it against the wall when you do not need it. Pull it out for cooking. Look for models with locking wheels and a butcher block top. This is a good fit for rental homes or kitchens that may change later.
Pick a Drop Leaf Island
A drop leaf island folds down when not in use. It saves floor space most of the day and gives you extra surface for big meals.
Skip Overhang Seating
If space is tight, skip stools. Use the island for prep only. This saves 12 to 15 inches of overhang and the clearance behind the stools. You can place a small table or bench elsewhere.
Think About a Galley Kitchen
A galley kitchen with parallel counters needs a 42 to 48 inch aisle. An island does not belong here. If you want more counter space, add a wall mounted shelf, rolling cart or counter extension.
Real Scenario: The 12 by 13 Foot Kitchen
A homeowner in Georgetown has a 12 by 13 foot kitchen. They want an island with seating. The room is 13 feet in one direction, just enough for the 13 foot rule. But the fridge is on the wall at one end and its door swings toward the island.
The fix: use a 24 inch island with a 42 inch aisle on the stove side. Move the seating to the short end of the island, away from the fridge. Choose a fridge with French doors, which need less swing room. The kitchen now works, and the owner keeps the island.
Other Real World Examples
The Builder Grade Kitchen With a Narrow Aisle
Many homes in Leander and Cedar Park have kitchens with 36 inch aisles around a small island. These work for one person. They do not work when two people cook or when someone sits at the island.
A better plan may be to shrink the island by 6 to 8 inches. That widens each aisle by 3 to 4 inches, or one aisle by the full amount. Sometimes that small change makes the room usable.
The Open Plan With a Large Island
Open floor plans often have room for a large island. But a long island can create a barrier between the kitchen and the living area. Leave at least one clear opening in the walkway, and keep it 42 inches or wider. Think about where guests will walk when they arrive.
The Family With Young Kids
Parents with young children need clearance for more than cooking. Kids run around islands. They pull stools out. They open drawers. Plan for 48 inches where you can. Keep sharp counter corners to a minimum. Rounded or clipped corners are safer and softer on the hip.
Lighting, Outlets and Floors Around the Island
Clearance is not only about measurements. The finishes around the island affect how it feels.
Lighting
Pendants over the island need height and spacing. They should hang 30 to 36 inches above the counter. Recessed lights should sit in front of the work areas so your body does not block them. For a full breakdown, see our kitchen lighting placement guide. It covers pendants, recessed cans and under-cabinet lights.
Outlets
An island needs outlets. Codes require at least one in most cases, and you will want more. Place them on the side or end of the island, where cords will not drape across the seating area. Pop-up outlets are an option, but they can be harder to reach.
Adding outlets or running new wiring to an island often needs a permit. Check when a home remodel requires a permit in Georgetown, TX before you start.
Flooring
Flooring has to work under stools, rolling carts and daily foot traffic. Tile, luxury vinyl plank and hardwood each handle scrapes differently. In a hot climate like Central Texas, flooring should handle heat and humidity. Use felt or rubber pads under stool legs to protect the floor.
Corners and Edges
Sharp corners are common on islands. Eased or rounded corners reduce bruises and look softer. A 2 to 3 inch radius is a common choice. Waterfall edges, which run the stone down the side of the island, add style. But they also add cost, and they reduce space for a toe kick or side storage.
How to Test Your Layout Before You Build
Do not trust a drawing alone. Test it in real space.
- Measure the room. Record wall lengths, cabinet depths and appliance door swings.
- Mark the island with painter’s tape. Use the real length and depth, including overhang.
- Add the aisle widths. Tape the lines where walls and cabinets sit.
- Cut cardboard for appliance doors. Place it where each door would swing open.
- Walk the space. Carry a laundry basket and a hot pot (an empty one will do).
- Sit on a real stool. Check knee room and the gap behind you.
- Have someone walk past. See if you can work and share the space.
Live with the tape for a few days. You will notice problems that a drawing will not show.
Common Island Clearance Mistakes
Most islands that feel wrong share the same few issues.
- Making the island too big. A huge island looks great in a showroom. In a real kitchen, it eats aisles.
- Forgetting overhang. Stone overhang counts toward your clearance. Always measure from the outer edge.
- Ignoring appliance doors. Measure open doors, not closed ones.
- Planning aisles of 36 inches in a work area. That is a walkway size, not a work size.
- Putting seating in the main traffic path. Stools belong in the quiet part of the room.
- Skipping the tape test. Tape costs almost nothing and saves a lot of regret.
- Choosing the island before the layout. The room should decide the island. Not the other way around.
You can read about more planning errors in our guide to common kitchen remodeling mistakes. Layout problems appear near the top.
Budget and Planning Notes
Island costs depend on size, stone and extras. A simple island with cabinets and a stone top costs less than one with a sink, cooktop and waterfall edge. Plumbing and electrical add labor. Moving a gas line or adding a vent can raise the price quickly.
If you are weighing an island in a larger project, our kitchen remodel cost guide for Central Texas shows what drives pricing. Layout decisions like island size and placement affect the whole budget.
If you are in the Georgetown area, our team can also review your plan in person. See our page on kitchen remodeling in Georgetown, TX for local details.
FAQs About Kitchen Island Clearance and Spacing
How much space should be between a kitchen island and the cabinets?
Plan for 42 inches for a one cook kitchen. Use 48 inches if two people cook together. The minimum is 36 inches, but that feels tight when appliance doors are open.
What is the minimum walkway width around a kitchen island?
Thirty-six inches is the absolute minimum for a walkway. For a working aisle, use at least 42 inches. This keeps the space comfortable and safe.
How much overhang do I need for seating at an island?
You need at least 12 inches of overhang for a standard 36 inch counter. Fifteen inches feels more comfortable. Allow about 24 inches of width per person.
How much room do I need behind kitchen island stools?
If no one walks behind the stools, plan for 32 to 36 inches. If people pass behind, plan for 44 to 48 inches from the island edge to the nearest wall or cabinet.
Can I put a kitchen island in a small kitchen?
Sometimes. You need about 13 feet of room width for a standard island with full aisles. In smaller rooms, try a narrow island, a peninsula or a rolling cart. These give you extra counter without crowding.
How big can a kitchen island be?
Most islands are 36 to 48 inches deep and 4 to 8 feet long. The right size depends on your room. Start with the aisle widths, and let the island fill the rest.
Do appliance doors count in island clearance?
Yes. Always measure with the door open. A dishwasher, oven or fridge door can take 24 to 36 inches of space. Add that to your aisle width to see if the layout works.
Measure the Aisles First
The best island is not the biggest one. It is the one that leaves enough room to cook, walk and sit without friction.
Keep these numbers in mind:
- 42 inches for a one cook aisle, 48 inches for two cooks
- 36 inches as the absolute minimum walkway
- 12 to 15 inches of overhang for seating
- 24 inches of width per seat
- 44 to 48 inches behind stools where people pass
- Open appliance doors before you finalize anything
Use tape on the floor to test the plan. Walk it with a real basket. Sit on a real stool. If anything feels tight, adjust now, before cabinets and stone arrive.
The National Kitchen & Bath Association publishes planning guidelines that back up many of these numbers. You can review them at NKBA’s website when you want a second reference.
Ready to Plan Your Kitchen Island?
A good island fits your room, your habits and your appliances. Rock Your House helps Central Texas homeowners plan kitchens that work as well as they look. We measure your space, review your layout options and coordinate cabinets, plumbing, electrical and finishes under one team.
If you are considering a new island or a full kitchen update, reach out to Rock Your House. We will walk your space, test the layout and give you clear next steps.