
You are chopping onions at the counter. A shadow falls across the cutting board. You lean to one side, and the shadow follows. The light is on, but it is in the wrong place.
This is the most common kitchen lighting problem. Most kitchens do not have too little light. They have light in the wrong spots. A bright ceiling does not help if your own body blocks it.
Good kitchen lighting placement fixes this. It puts light where you work, where you walk and where you eat. It also makes the room feel calm instead of harsh.
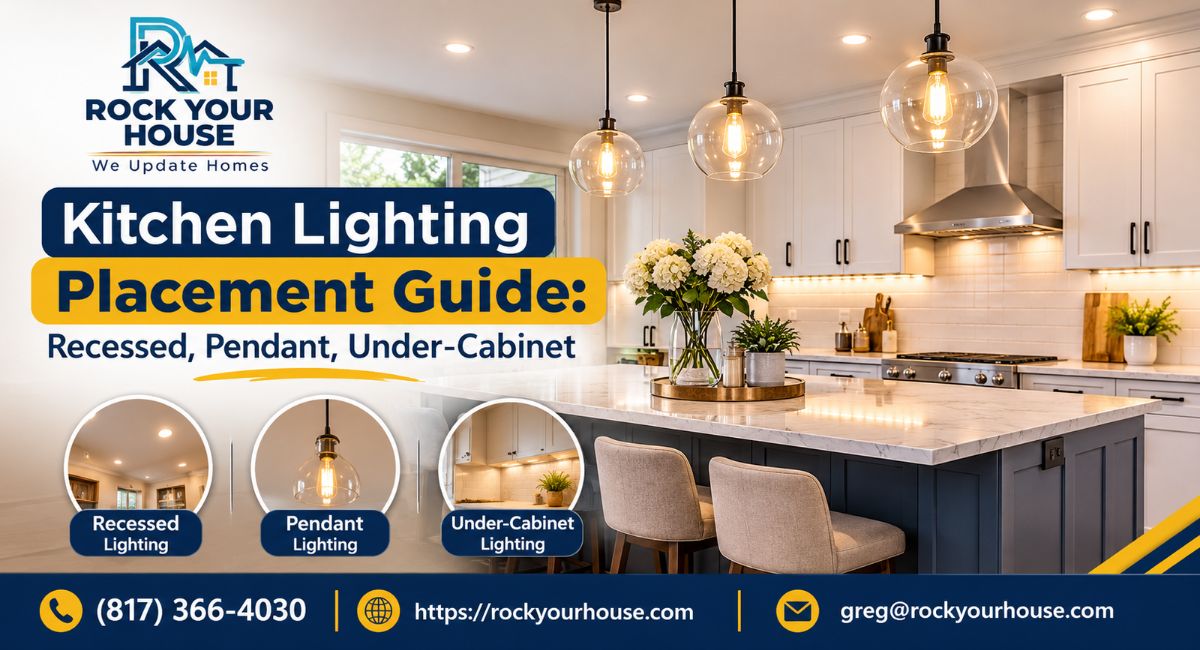
This guide shows you how to light a kitchen properly. You will see where recessed, pendant and under-cabinet lights belong. You will also get spacing rules, color temperature advice and a list of mistakes to avoid. Whether you are planning a full remodel or a small update, the same principles apply.
Why Kitchen Lighting Matters More Than You Think
A kitchen is not one room. It is a work zone, a dining space and a gathering spot. Sometimes it is a homework desk too. Each use needs a different kind of light.
Poor lighting causes real problems:
- Eye strain when you cook or read recipes
- Cutting accidents on dim counters
- Dark corners that make the room feel smaller
- Glare on glossy countertops and backsplash tile
Good lighting does the opposite. It makes prep work safer. It shows off your cabinets and counters. It also helps the room feel larger and more open.
Lighting is also one of the cheapest places to get big results. A new paint color changes the walls. A new lighting plan changes how you use the whole room.
Start With the Three Layers of Kitchen Lighting
Designers plan kitchens in layers. Each layer has a job. When all three work together, the room feels balanced.
Ambient Lighting
Ambient lighting is the general light for the whole room. It fills the space so you can walk around safely. In most kitchens, recessed ceiling lights provide this layer. Flush mount fixtures and track lights can also do the job.
Think of ambient light as the base. It should be even and soft. It should not be the only light in the room.
Task Lighting
Task lighting is focused light for work areas. This is where kitchen task lighting earns its place. Counters, the sink, the stove and the island all need it.
Under-cabinet lights are the most common task fixtures. Pendants over an island also count. The goal is simple: bright, shadow-free light exactly where your hands are.
Accent Lighting
Accent lighting adds depth and style. It highlights glass-front cabinets, open shelves, a tile backsplash or an architectural detail. It is not required for function. But it adds the finish that makes a kitchen feel designed.
Toe-kick strips, in-cabinet lights and small picture lights are common accent choices.
How the Layers Work Together
Here is a simple way to think about it. Ambient light lets you see the room. Task light lets you work. Accent light makes you enjoy it. Skip one layer and the kitchen feels off.
Put each layer on its own switch or dimmer. This gives you control. You can run bright task lights for cooking and soft accent lights for a quiet evening.
Plan Before You Place a Single Fixture
Do not start by picking fixtures. Start with how you use the kitchen.
Walk through your daily routine. Where do you chop food? Where do you load the dishwasher? Do you do homework at the island? Do you cook with a partner?
Then mark these zones on a sketch:
- Prep areas (main counter run and island)
- Cooking area (range and hood)
- Cleaning area (sink and dishwasher)
- Eating areas (island seating, breakfast nook)
- Walkways and entries
Each zone gets its own lighting plan. This is the core of any good kitchen lighting layout guide.
Also note your ceiling height, cabinet height and window locations. In Central Texas, strong afternoon sun often pours into kitchens with west-facing windows. Daytime may need less artificial light, while evenings need more. Your plan should cover both.
If you are planning a larger project, lighting should be set early. Wiring is easier before drywall goes up. Our professional team for kitchen remodeling services in Central Texas maps out electrical and lighting during the design phase, so no one cuts into a finished ceiling later.
A Simple Kitchen Lighting Diagram
Here is a top-down view of a basic galley-plus-island kitchen. It shows how the layers sit together.
[ WINDOW ]
______________________________
| [UC]=====[UC]=====[UC] | <- Upper cabinets with
| o o o | under-cabinet strips (UC)
| (Counter / Range / Sink) |
| |
| P P P | <- Pendants over island (P)
| [====== ISLAND =====] |
| |
| o o o | <- Recessed lights (o)
|______________________________|
The key points from this layout are easy to remember:
- Recessed lights run in rows, not random spots.
- Under-cabinet strips cover the full counter length.
- Pendants hang over the island, not over open floor.
- The island has both task light (pendants) and ambient light (recessed).
Now let us look at each fixture type in detail.
Where to Put Recessed Lights
Recessed lights, also called can lights or downlights, sit flush in the ceiling. They are the workhorse of ambient kitchen lighting. They are clean and low profile. They also work with almost any style.
The Spacing Rule
A common starting rule: divide your ceiling height by two. That gives you the spacing between lights.
- 8 foot ceiling: about 4 feet apart
- 9 foot ceiling: about 4.5 feet apart
- 10 foot ceiling: about 5 feet apart
This is a guide, not a law. Beam angle, trim size and bulb output all change the result. A narrow beam needs closer spacing. A wide flood beam can stretch further.
Distance From the Wall and Cabinets
Place the first row about 24 to 30 inches from the wall. This puts light in front of your body when you stand at the counter. It lights the counter surface and the cabinet faces.
Many people center cans in the middle of the room and call it done. This causes shadows. When you stand at the counter, your body sits between you and the light. The shadow lands on your work.
A better method is to align the lights with the front edge of the counter or just in front of it. This sends light over your shoulder, not behind you.
Do Not Place Lights Directly Over Your Head at the Sink
A light directly above the sink area sometimes causes face shadows. Shift it slightly toward the room, or add a task light near the window. Light on the sink should come from the front and above.
Choose the Right Size
Four-inch and six-inch trims are the most common choices. Four-inch lights look more modern and refined. Six-inch lights give more output per fixture. In smaller kitchens, four-inch lights keep the ceiling from looking crowded.
Use adjustable gimbal trims where you want to aim light at a wall or work area. Fixed trims point straight down.
Check the Ceiling Details
Recessed cans need clear space above them. In Texas homes, attics get very hot. Use IC-rated, airtight housings if the ceiling touches insulation. Airtight cans also stop conditioned air from leaking into the attic. This matters in a climate where cooling costs run high most of the year.
Many builders install thin LED wafer lights. These need less ceiling depth. They are a good choice when a ceiling has ducts or beams in the way.
Where to Put Pendant Lights
Pendants add style and task light. They are most common over islands and peninsulas. They also work over a breakfast table or a sink.
Height Over the Island
Hang pendants so the bottom of the fixture sits about 30 to 36 inches above the countertop. This works for standard 8 to 9 foot ceilings. With 10 foot ceilings, add 3 to 6 inches.
Too low and the pendant blocks views across the room. Too high and it floods the eyes with glare. Sit at the island and check your sight line. You should see people across from you without ducking.
Spacing Between Pendants
Space pendants about 24 to 30 inches apart, measured center to center. Keep the outer pendants at least 6 to 12 inches inside the island’s edges. The fixtures should look centered on the island, not hanging off the end.
How Many Pendants Do You Need?
Use this simple guide:
| Island Length | Suggested Pendants | Notes |
| Up to 4 feet | 1 large or 2 small | One large fixture can anchor the space |
| 5 to 6 feet | 2 medium | Space evenly, about 30 inches apart |
| 7 to 8 feet | 3 medium | Center the middle one on the island |
| 9 feet or more | 3 to 4 | Or use a linear fixture |
Odd numbers often look better. Three pendants feel balanced. Two work well when the island is shorter.
Match Scale to the Room
A tiny pendant over a large island looks lost. A huge pendant in a small kitchen overwhelms the room. As a rough guide, the combined width of all pendants should be about one half to two thirds of the island length.
Add Dimmers
Pendants are bright and close to eye level. Always put them on a dimmer. This lets you tone them down during dinner. It also stops harsh glare when the island doubles as a social spot.
Think About Glass and Finish
Clear glass shades show the bulb. That adds sparkle but can cause glare. Frosted or opaque shades soften the light and hide the bulb. Metal domes push light downward, which is good for task work.
Where to Put Under-Cabinet Lights
If you do one thing for better kitchen lighting, add under-cabinet lights. They are the best way to light counters. They sit between you and the work surface. That removes the shadow problem entirely.
Why They Work So Well
Ceiling lights come from above and behind you. Under-cabinet lights come from above and in front of you. Your body no longer blocks the beam. The counter gets even light with no dark patches.
Mounting Position
Mount the strip toward the front of the cabinet underside, not at the back wall. A good spot is the front third of the cabinet depth. Light from the front reaches the whole counter. Light from the back creates a bright stripe on the backsplash and leaves the counter edge dim.
A front-mounted strip also keeps the LED hidden if the cabinet has a small front lip or light rail. This stops glare when you sit or look across the room.
Choose the Right Type
You have a few options:
- LED strips: Flexible and very thin. They give continuous light with no gaps. Best for most kitchens.
- LED bar or puck lights: Easier to install, but pucks create scalloped light spots. Bars give a more even spread.
- Linear fixtures: Hardwired and durable. Good for new builds and remodels.
For the best counter coverage, run the strip the full length of each cabinet run. Do not leave gaps.
Think About Glossy Surfaces
Polished granite, quartz and glossy tile reflect light. A bright LED strip can create a mirror glare on the backsplash. To reduce this, use a diffuser lens or a matte backsplash finish. Frosted lenses spread the light smoothly.
If you are still picking surfaces, our quartz vs granite countertops comparison explains how each material handles reflection and heat. And if you are planning tile, see these kitchen backsplash ideas for Georgetown, TX homes to match tile with your lighting plan.
Power and Switches
Hardwired strips look cleaner than plug-in ones. Run the wiring inside the cabinet or behind a light rail. Put them on their own switch, ideally with a dimmer. This lets you use them as night lights too.
Quick Reference: Fixture Placement at a Glance
Use this table as a fast check while you plan.
| Fixture | Main Job | Placement Guide | Common Mistake |
| Recessed lights | Ambient light | 24 to 30 inches from wall, spaced about half the ceiling height | Centering cans in the middle of the room |
| Pendant lights | Task and style | 30 to 36 inches above island, 24 to 30 inches apart | Hanging too low and blocking sight lines |
| Under-cabinet strips | Counter task light | Front third of cabinet underside, full counter length | Mounting at the back and leaving gaps |
| Toe-kick or in-cabinet | Accent light | Along base or inside glass cabinets | Using cool white that clashes with warm tones |
Color Temperature: The Detail Most People Skip
You can place every light perfectly and still hate the room. Color temperature is often the reason.
Color temperature is measured in Kelvin (K). It tells you if light looks warm (yellow) or cool (blue-white). Low numbers are warm. High numbers are cool.
| Kelvin Range | Light Appearance | Best Use in Kitchens |
| 2700K | Warm, like a classic bulb | Pendants, dining areas, accent lights |
| 3000K | Soft warm white | Most kitchens, a safe all-around choice |
| 3500K | Neutral warm | Task zones, modern kitchens |
| 4000K | Neutral to cool white | Work-heavy kitchens, very bright spaces |
| 5000K and up | Daylight blue-white | Rarely good for homes, can feel clinical |
Keep It Consistent
The biggest mistake is mixing temperatures. If your recessed lights are 3000K and your under-cabinet strips are 4000K, the room looks patchy. The eye notices the difference right away.
Pick one temperature and stay with it across all layers. For most homes, 3000K is a reliable choice. Some people like 3500K for a crisper look with white cabinets. Warm wood cabinets usually look better at 2700K or 3000K.
Some LED fixtures let you adjust color temperature with a switch. These tunable fixtures are helpful when you are unsure.
Look at CRI Too
Color Rendering Index (CRI) tells you how accurately a light shows colors. A low CRI makes food look dull and cabinets look off. Look for a CRI of 90 or higher in a kitchen. Fresh produce, wood grain and stone all look better under high-CRI light.
Understand Lumens, Not Watts
Watts measure power use. Lumens measure brightness. LED bulbs use so little power that watts no longer tell you how bright a light is.
A common design target is around 30 to 40 lumens per square foot for general kitchen light, with more on work surfaces. A 150 square foot kitchen might need about 4,500 to 6,000 lumens of ambient light. Then add task layers on top. These are guide numbers. Your needs depend on wall color, cabinet finish and how much daylight you get.
The U.S. Department of Energy has a helpful overview of LED lighting basics, including lumens and color. It is a solid reference when you compare bulbs.
How to Prevent Shadows in a Kitchen
Shadows are the main complaint people have about kitchen lighting. Here is how to stop them.
Light From the Front
Any light behind you casts your shadow forward. Place task lights in front of the work area. Under-cabinet lights do this naturally. Recessed lights near the counter edge help too.
Use Overlapping Light Sources
When two lights cover the same spot from different angles, one fills in the shadow the other makes. This is why a good plan uses overlapping layers. A counter lit by recessed cans and under-cabinet strips has almost no dark areas.
Light the Cabinet Faces
Dark cabinet doors absorb light and make the room feel dim. Aim some recessed lights to wash the cabinet faces. Gimbal trims make this easy. Lit cabinets reflect light back into the room.
Watch Tall Cabinets and Hoods
A tall pantry or a large range hood can block ceiling light. Add a light inside or under the hood. Most hoods include built-in lights. Check that the stove area has its own focused light so you can see pots and pans.
Mind the Sink
Many sinks sit under windows. Daytime is fine, but at night the window turns black. Add a recessed light or small pendant in front of the sink. This lights the basin without a shadow on your hands.
Real Scenarios: Three Common Kitchen Layouts
Theory helps, but real examples help more. Here are three layouts you might recognize.
The Builder-Grade Kitchen With Four Cans in the Center
Many Georgetown and Leander homes built over the past 15 years came with a small grid of recessed lights in the middle of the ceiling. The counters get shadows. The island gets none of its own light.
A fix: add two rows of recessed lights closer to the counters. Install under-cabinet strips on every wall run. Hang two or three pendants over the island. This uses the existing wiring plan as a base and adds only what is missing.
The Open Concept Kitchen With a Large Island
Open plans share light with the living room. The kitchen needs to feel connected but still separate. Here, pendants define the island zone. Recessed lights set a gentle ambient base. Dimmers let the kitchen fade down when guests are in the living space.
Keep color temperature the same across both rooms. Different tones make the open space feel broken.
The Small Galley Kitchen
Narrow kitchens do not need many fixtures. One row of four-inch recessed lights down the center works well. Pair it with full-length under-cabinet strips. Skip pendants unless there is a dining nook. Too many fixtures make a small room feel cramped.
Smart Controls and Dimmers
Controls turn a good layout into a flexible one.
Dimmers let you adjust brightness for the task. Bright for chopping vegetables. Low for late dinners. Use LED-rated dimmers, because standard dimmers can cause flicker with LEDs.
Separate switches for each layer give you more choice:
- Switch 1: recessed ambient lights
- Switch 2: pendants
- Switch 3: under-cabinet task lights
- Switch 4: accent or toe-kick lights
Smart switches and voice control add convenience. But they are optional. A set of good dimmers does most of the work.
Also think about motion sensors in pantries and toe-kick lights. A soft glow at night saves you from turning on bright overhead lights.
Common Kitchen Lighting Mistakes to Avoid
Many problems come from a few repeated errors. Here are the ones we see most often.
- Relying on one type of light. A single layer cannot handle every task. Use all three.
- Skipping under-cabinet lighting. This is the cheapest fix for counter shadows.
- Mixing color temperatures. Pick one and stick with it.
- Hanging pendants too low. Block sight lines and you will bump your head.
- Placing recessed lights too far from the counters. Move them closer to the work zone.
- Forgetting dimmers. Bright light all the time gets tiring.
- Ignoring ceiling and attic conditions. In Texas heat, use IC-rated airtight housings.
- Choosing fixtures before the plan. The layout decides the fixtures, not the other way around.
You can read about more planning errors in our guide to common kitchen remodeling mistakes. Lighting appears near the top of the list for a reason.
Budget, Timeline and Permits
Lighting costs depend on the fixtures, the wiring and the ceiling. Simple swaps in an existing layout cost less. Adding new circuits, opening ceilings or moving junction boxes costs more.
Under-cabinet LED strips are often a modest cost compared to the benefit. Recessed lights add cost per fixture, plus labor to cut and wire each opening. High-end pendants can cost more than the rest of the plan combined.
If lighting is part of a larger project, it affects your budget and schedule. Our kitchen remodel cost guide for Central Texas breaks down what drives pricing. For timing, see how long a kitchen remodel takes. Electrical rough-in usually happens early, before drywall and cabinets.
Permits
New wiring, added circuits and panel changes often need a permit and inspection. Replacing a fixture in the same spot usually does not. Rules vary, so confirm with your city before you start. Our Georgetown remodeling permit guide explains when a permit is needed.
Hire a licensed electrician for any new circuit or ceiling work. Lighting is not the place to cut corners on safety.
A Step-by-Step Plan You Can Follow
If you are ready to design your own layout, follow these steps.
- Measure the room. Note ceiling height, wall lengths and cabinet runs.
- Mark your zones. Prep, cook, clean, eat and walk.
- Place under-cabinet strips first. Cover every counter run.
- Add recessed lights. Use the half-height spacing rule and keep them 24 to 30 inches from walls.
- Hang pendants. Center them over the island, 30 to 36 inches above the top.
- Choose one color temperature. 3000K works for most kitchens.
- Add accent lighting. Glass cabinets, toe-kicks or open shelves.
- Wire in layers with dimmers. One switch per layer.
- Test before you finish. Tape up temporary lights or use a lighting app to preview the effect.
Do a night test when possible. A kitchen that looks great at noon can feel different at 8 p.m.
Lighting Works Best When It Is Part of the Whole Design
Lighting does not stand alone. It interacts with cabinet color, counter finish, paint and tile. Dark finishes soak up light. Glossy surfaces bounce it. White and light colors spread it.
If you have dark cabinets, plan more fixtures or higher output. If you have white cabinets and light counters, you can use fewer. Always test with real samples in your own space.
Large kitchen changes also affect nearby rooms. If you are planning an open layout, lighting may extend into the dining and living areas. If you are weighing a bigger project, our guide on whether to remodel one room or renovate the whole house can help you decide where to start.
FAQs About Kitchen Lighting Placement
How many recessed lights do I need in a kitchen?
A good starting point is one light every 4 to 5 feet. A 12 by 14 foot kitchen often needs six to eight. Add more if your cabinets are dark or the ceiling is tall.
How high should pendant lights hang over a kitchen island?
Hang them 30 to 36 inches above the countertop. Raise them a few inches for ceilings above 9 feet. Check your sight lines by sitting at the island.
What is the best color temperature for kitchen lighting?
Most kitchens look best at 3000K. It is warm but still clean. Use 3500K for a crisper look. Keep every fixture at the same temperature so the room looks even.
Where should under-cabinet lights be placed?
Mount them near the front of the cabinet underside. The front third works well. This lights the whole counter and reduces glare on the backsplash.
Can I mix recessed, pendant and under-cabinet lights?
Yes, and you should. Each one does a different job. Together they remove shadows and give you light for every task.
Do I need a permit to add kitchen lighting?
Replacing a fixture in the same spot usually does not need one. New wiring or new circuits often do. Check with your city before work begins.
Is LED better than halogen or incandescent for kitchens?
LED runs cooler, lasts longer and uses less power. In a hot climate like Central Texas, cooler fixtures also reduce load on your air conditioning. LEDs also come in many color temperatures.
Light the Work, Then Light the Room
The best kitchen lighting is simple in idea. Light the work areas first. Add soft general light second. Finish with accents that match your style.
Remember these key points:
- Use all three layers: ambient, task and accent.
- Place recessed lights near the counters, not in the middle of the room.
- Hang pendants 30 to 36 inches above the island.
- Mount under-cabinet lights toward the front of the cabinet.
- Pick one color temperature and keep it everywhere.
- Add dimmers to every layer.
Get these right and the kitchen works better every day. You cook with less strain. You host with more ease. The room simply looks better.
Ready to Plan Your Kitchen Lighting?
If you are thinking about a kitchen update, lighting should be part of the plan from day one. Rock Your House helps homeowners across Central Texas design, wire and build kitchens that work and look right. We handle layout, electrical coordination and finish work under one roof.
Planning a project in your area? See our pages for kitchen remodeling in Georgetown, TX or call the team at Rock Your House to talk through your layout. We will walk your space, review your lighting needs and give you clear next steps.